

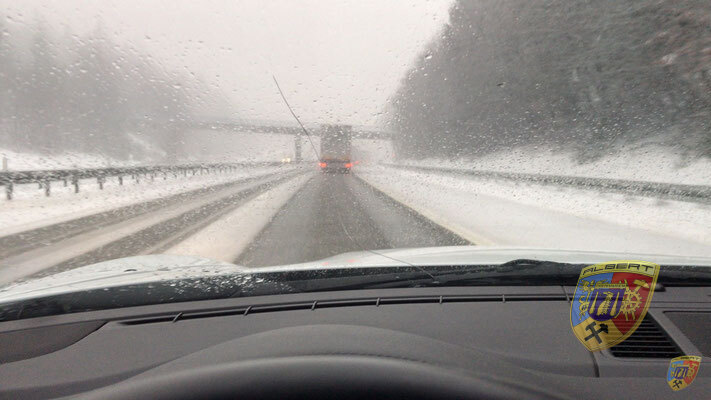
It's a long drive through wintry Germany before I stand in front of our new customer's house.
From there I will bring his beautiful Porsche 997 Carrera in GT3 look to our company.
Our new customer had inquired about the best repair method for his engine damage on the Internet,
and then decided on our company as a repair shop. During the telephone calls in advance and during
upon collection, we had discussed the core of the most important points of the upcoming work.
Below I list the repair process in words and pictures, so that our customer
and you, dear readers, can find out about the execution of our work.
If you have any questions about the technology, we are at your disposal.
- Collection of the vehicle at the customer's home
- Delivery of the vehicle to our company
- Waiting time until the job can be executed
- Take the vehicle from the waiting room to the workshop on the lift
- Remove all underbody panels
- Drain all liquids (oil - cooling water - air conditioning etc.)
- Engine and transmission removal
- Dismantle the engine and mount it on an assembly stand
- Removal of the intake system
- Removal of the injection system, the intake manifold and surrounding parts
- Removal of all cables and lines, hoses etc.
- Removing the cylinder heads with camshafts, chains, etc.
- Dismantling the engine body with dismantling of the pistons
- Removal of the crankshaft, connecting rod, intermediate shaft
- Inspection of all parts with identification of acute defects
- Inquiry with the manufacturer and supplier about the ability to deliver all components
- Contacting Sattler regarding the availability of the Alcantara equipment
- Contact our exhaust manufacturer to create a mid-exhaust system
- Current status:
- Preparation of a cost estimate for all options requested by the customer
- Probing the ability to deliver and delivery times for all relevant conversion parts
- Scheduling with our milling center to mill out the engine block
- Provision of all materials for the planned engine construction to 4.2 liters
- Termination of the production of forged pistons for the 4.2 liter engine variant
- Termination of the production of the piston rings for the 4.2 liter engine variant
- Placing an order according to a cost estimate as follows:
- Conversion of the existing engine to an Albert - Motorsport 4.2 liter variant with
forged pistons and standard compression while maintaining the electronic
parameters of the engine via the broadband lambda probe. - Installation of a large intake system with a large throttle valve
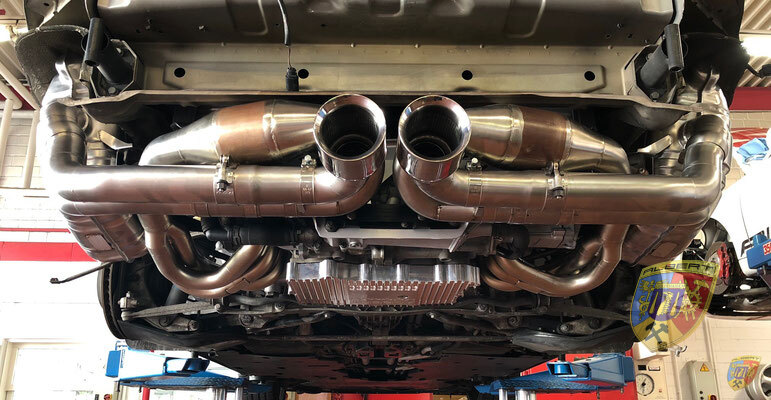
- Production and assembly of a stainless steel sports exhaust system, analogous to the 997 GT3 RS with center exit.
- Installation and painting of a Porsche 997 GT3 RS 3.8 - 4.0 liter rear spoiler gluing of a large PORSCHE
- Lettering on the spoiler sheet painted in white analogous to the Porsche 997 GT3 Cup - omitting the series
- Lettering on the tailgate.
- Installation of an LED daytime running light (alternative accessories according to customer requirements)
- Solid assembly / reinforcement of the driver's seat, which is still wobbly at the moment
- Disassembly of the standard rear spoiler
- Adaptation and assembly of the new 997 GT3 RS rear spoiler
- Dismantling the driver's seat - repairing the torn-out threaded sleeve in the laminate with epoxy
- Checking and modifying the seat console
- Forged piston blanks are now made for us, the announced delivery time is approx. 4 - 5 weeks
- High-strength piston rings for piston and cylinder gauge blocks for our graphite cylinders are manufactured.
- The announced delivery time is approx. 4 - 5 weeks
- A center exhaust made of stainless steel with pipes with a large cross-section analogous to the 997 GT3 RS is made.
- Received the order confirmation for the piston forging blanks
- Received the order confirmation for the piston rings and gudgeon pins
- Bringing the customized rear spoiler to our painter
- Production of graphite cylinder blanks for the planned engine conversion
- Free turning of the motor housing
- Milling work on the inside of the motor housing
- Arrival of the first Porsche tuning parts - complete X51 intake system
- Arrival of the graphite cylinder blanks
- Notification to the customer that the forging blanks have not yet been delivered.
- Commitment to delivery of the piston - forged blanks by Thursday / Friday
- Commitment to delivery of the piston rings for the notified cylinder size by Monday
- Arrival of the pistons and piston rings
- Fine machining of the pistons and piston rings to the future cylinder - final dimensions
- Coating of the piston skirts with solid graphite
- Drilling out and fine-tuning of the connecting rods to the final size of the gudgeon pin
- Free turning and milling of the cylinder seats in both halves of the engine housing
- Rough pre-turning of the cylinder blanks
- Precision turning of the cylinder blanks to fit and glue dimensions in the engine block
- Pressing and gluing the cylinder blanks into the engine block halves
- Pre-bore the cylinders to a rough piston size
- Precision boring of the cylinders to 1/10 mm of the final piston size
- Fine grinding of the engine block halves in the area of the
- cylinder head gaskets
- Pre-honing of the inner cylinder surfaces
- Fine honing of the inner cylinder surfaces to an accuracy of 1/100 mm
- Coating of piston skirts with solid graphite
- Turning out the piston pin bearings in the connecting rods
- Production of new bearing bushes from high-strength bronze for connecting rod eyes
- Reaming the gudgeon pin bearings to 1/100 mm fitting accuracy to the gudgeon pins
- Previous angling of the connecting rods at 90° to the crankshaft
- Fine - polishing of the crankshaft bearings
- Measuring and adjusting the KW bearing fits with Plastilube
- Assembly of the engine block half in the engine stand
- Start assembling the engine
- Assembling the crankcase
- Installation of the crankshaft and connecting rod
- Installation of the intermediate shaft
- Installation of the pistons and piston rings
- Written customer contact regarding completion and technical questions
- Assembling the crankcase and cylinder heads
- Takeover of the rear spoiler from the painter with subsequent assembly
- Installation of the timing chains and other internals of the engine
- Installation of the complete valve train and camshafts
- Precise timing adjustment
- Performing a Cylinder - Leakage Test. Result = 100% OK, so perfect!
- Installation of the surrounding motor and control components
- Installation of the new large intake system with adjustment of all surrounding components
- Assembly of the engine with preparation for installation
- Installation of the exhaust bracket and installation of the cat system and fan manifold system
- Production of further image material for the documentation
- First test run without rear silencers, which unfortunately are still behind schedule
- Notification from UPS that the mufflers were lost in transit
- Notification from the manufacturer that, according to UPS, the search query has not been successful to date
- Consultation with the exhaust - manufacturer that, if the dampers until next Wednesday
- 03/28/18 are not in our house, a new system and new dampers are made for us.
- Installation of the painted rear spoiler
- Contacting the foil suppliers to obtain an identical foil for the spoiler lettering.
- Renewed correspondence with the exhaust manufacturer and UPS, the rear silencer has not yet been found
- UPS replaces the loss - damage at the earliest after a waiting period of 8 working days
- Consultation - contacting our manufacturer when the new system to be built is available for us
- Agreement with the manufacturer: "On Tuesday after XX.XX.XXXX we will send back the parts of the system that have already been delivered,
- if the lost system has not been found - a new one will be made to match it - as soon as possible
- Rear silencer made for the vehicle"
- E-mail - contact with the customer, answering his questions, notification that if the facility until Tuesday after
- XX:XX:XXXX is not with us, a completely new rear silencer system will be built for him at UPS expense.
- UPS - recall on XX.XX.XXXX, the exhaust system is found. It will now be sent to us by express,
- so that she is in our company on Tuesday.
- Arrival of the exhaust system
- Immediate installation of the exhaust system - test run - leak test etc.
- Short test drive - result in a slight jerking in the transition area (partial load) Electronic check of all sensors and electronic components: result camshaft sensor left engine bank stiff. Installed used part - result - jerking has disappeared. New part ordered for customer.
- Color fan from the foil - supplier received - suitable foil ordered - rest of the foil for the customer
- Driver's seat post-laminated with epoxy. Seat console re-attached - marginal slight play in the seat rail, wobbling in the driver's seat eliminated.
- Test drive done with a used sensor - result: the car runs fantastic, just like a GT3!
- Appointment made for the dynamometer - sensor from Porsche still in arrears
- Dynamometer - Perform test with used camshaft sensor. Appointment announced.
- Email - consultation with the customer - "preliminary fixed" delivery date notified.
- Premature bringing of the vehicle to the dynamometer wg. Failure of another customer
- Lashing down the vehicle on the dynamometer. Running off all parameters - control - adjustment - correction of the motor - parameters if necessary.
- Departing all parameters - performance test - result ... yesss!!
- Long test drive done, the car runs fantastic, pulls through like a GT3 and accelerates completely unleashed from lowest revs, high.
- A real fun machine with super sound!
- A defect is presented to us, namely, in our opinion, the "breakaway moment" of the starter is too low,
- the starter does not turn powerful enough. Let's take a closer look at that.
- Result: battery has undervoltage, when starting - the "volt range" pulls down to below 9 volts.
- The starter has too high a current consumption and a
- Mehr zu diesem AusgangstextFür weitere Übersetzungsinformationen ist ein Ausgangstext erforderlich
- Feedback geben
- Seitenleisten
- Verlauf
- Gespeichert
- Etwas beitragen
- Zeichenbeschränkung: 5.000. Du kannst mithilfe der Pfeile weiter übersetzen.
- too little power, therefore AT - built-in starter.
- The film has arrived, the rear spoiler is immediately pasted according to customer requirements.
- Final exam and final test drive, this test drive was passed perfectly and without any complaints
We are happy to give our customer a very well running sports car
to be able to deliver, with which he can go on a 997 GT3 hunt in the future!
Jürgen Albert
master mechanic
Team Albert Motorsport
Comments 1
Albert Motorsport Author
HERE you´ll find further Engine - Projects